Continuous Visual Integration for Ember apps
17 October 2016
I recently watched Mike Fotinakis's presentation at the San Francisco Ember meetup, Continuous Visual Integration with Ember, and I've become really enthusiastic about visual diffs, and Percy.
It's really worth the time and I highly recommend to watch it. I could say "watch it now and then come back" but it's a 50-minute long video while this post takes 5 minutes to read, so I recommend to do it the other way around: read this post first and then go and watch the presentation where he goes into more details on what visual diffs and CI are, how Percy works and answers to questions from the audience.
Ready? Cool. Start the timer and let's go.
So what is continuous visual integration?
I will give you the high-level definition and rationale of visual diffs and continuous visual integration as the post otherwise wouldn't make sense.
When we change code, the intangible stuff apps are made of, we risk breaking it. To prevent this, we write tests that guard against regression (a nice way of saying breaking stuff) and do code reviews where someone goes over the code diffs, and potentially after a series of edits, confirms it.
However, that's just the code part. There are other ways to break a web application, a major one among them is for the app to look differently than before, in an unintended way. The background color of a button might change, a link could have become hidden, or a css file could no longer be downloaded which all lead to a degraded visual experience for visitors of the app.
Our (textual) tests could pass with flying colors and yet the users of the app could be running away screaming from our site. Visual diffs guard against that scenario by showing a visual diff, what certain scenarios looked before and after the code changes under test.
Visual diffs as part of the review process
The idea is to have screenshots made at certain points in our user flows and have a review process that approves the changes, just as we do for code.
To automate the process, we integrate the generation of visual diffing in the automated testing process. This will produce the "before" and "after" screenshots that will be used to generate the diffs. Let's see how this is done in practice.
Making all this a breeze with Percy
Percy is a visual diffing tool that automates all of this and integrates smoothly into the Github pull request process. To get started with Percy, install the Ember addon:
1$ ember install ember-percy
If you use Mirage for your tests, like I do, make sure to define a passthrough rule for Percy on top of your Mirage config, before any other rules (see the docs):
NOTE Starting from ember-percy version 1.2.4, you no longer need to do the above as ember-percy doesn't use Mirage anymore.
To demo how the development flow changes to accommodate visual diffing, I prepared a PR to make a dropdown in the Rock and Roll with Ember demo nicer.
Before implementing the change, I wrote a test that verifies if the songs for a particular band are listed correctly:
 1// tests/acceptance/songs-test.js
 2import Ember from 'ember';
 3import { test } from 'qunit';
 4
 5(...)
 6
 7test('List songs for a band', function(assert) {
 8  visit('/bands');
 9  click('a:contains("Tool")');
10  percySnapshot('list-songs-for-band');
11
12  andThen(function() {
13    assert.equal(Ember.$('.song').length, 3, "All songs for the selected band are displayed");
14    assert.equal(Ember.$('.song:contains("46 & 2")').length, 1, "The first song is displayed");
15  });
16});
The thing to note here is percySnapshot. If Percy is set up in the environment where the test runs, it generates a screenshot identified by the name we pass it (or auto-generates one). To set up Percy, the PERCY_TOKEN and PERCY_PROJECT env vars need to be set in the CI tool of your choice. The Percy docs explain how.
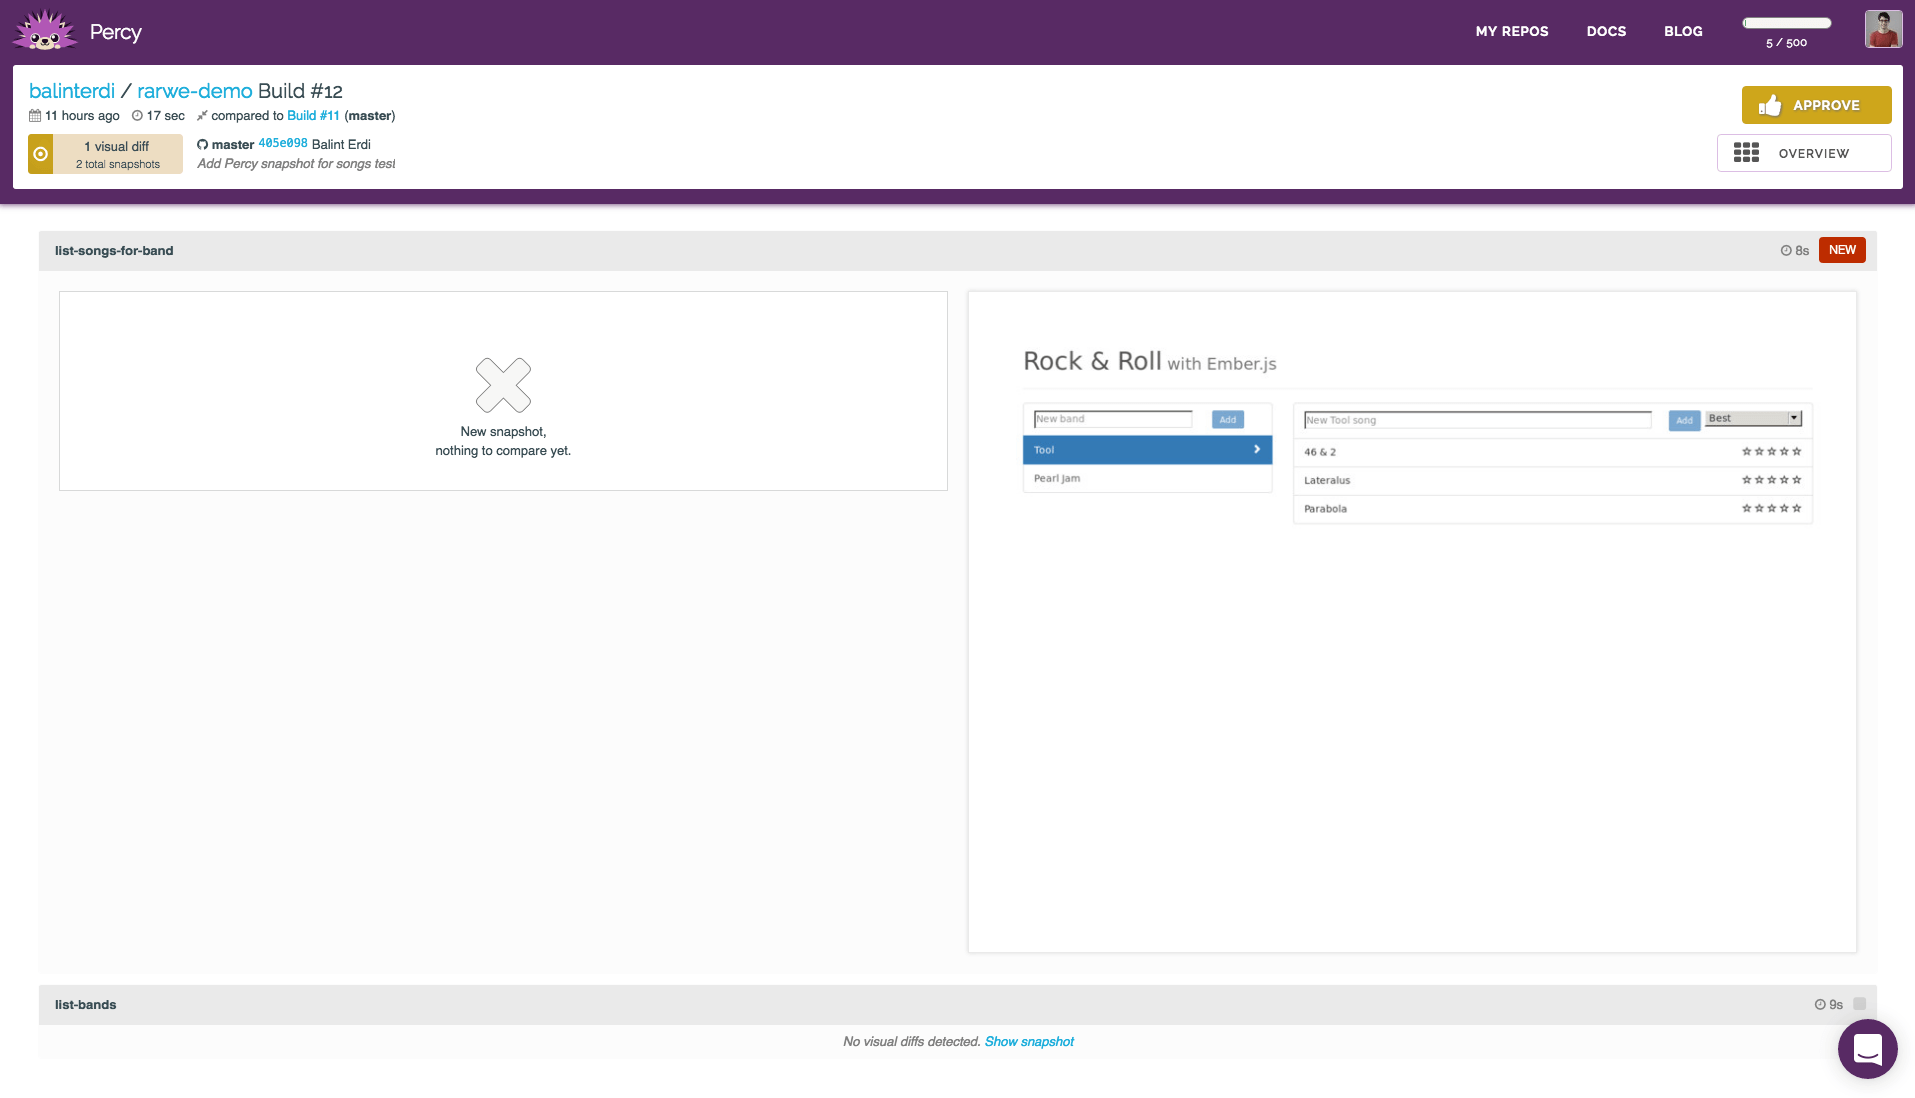
Once we have a percySnapshot, the next time we push and our CI builds the project, Percy will have a new snapshot for us:
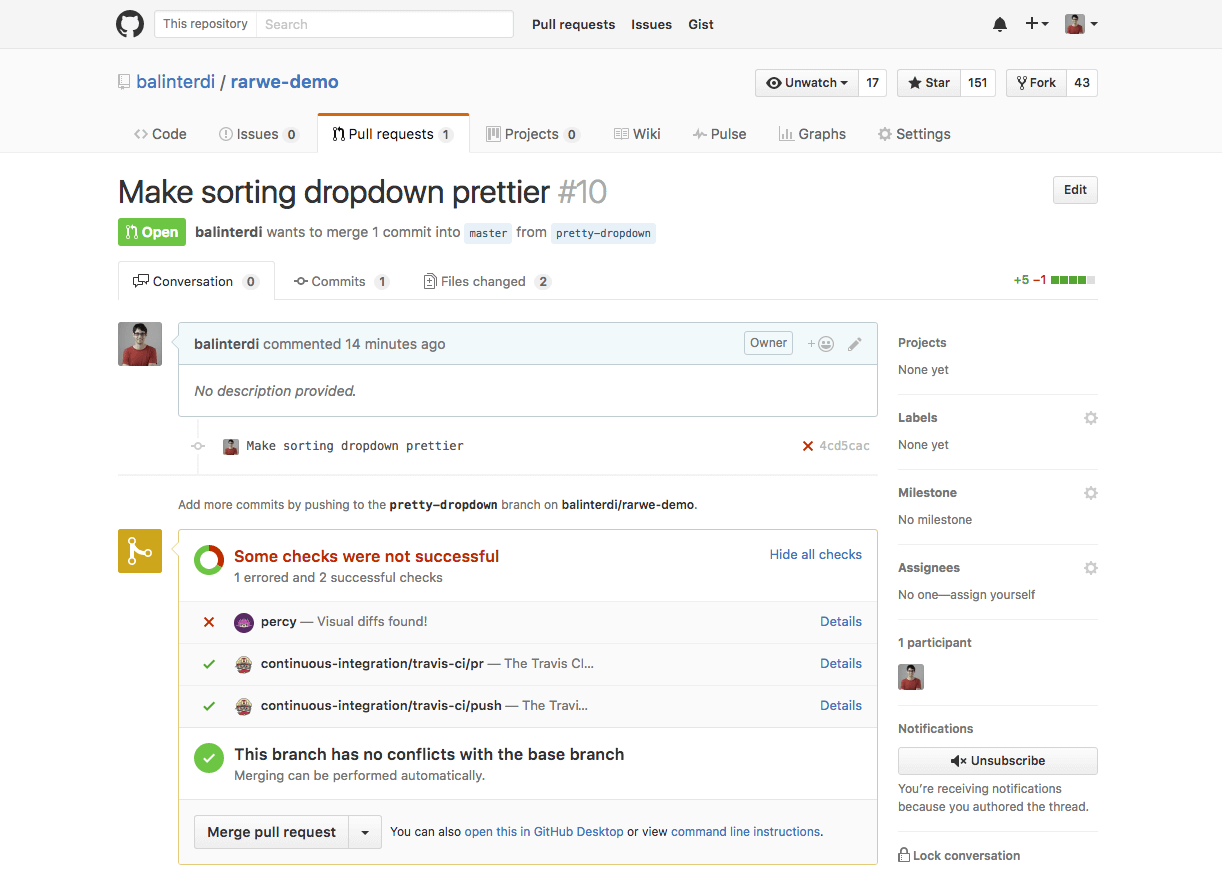
We can now implement our feature on a branch and create a pull request for it on Github. As you can see on the following screenshot, approving the visual diffs is now part of the flow:
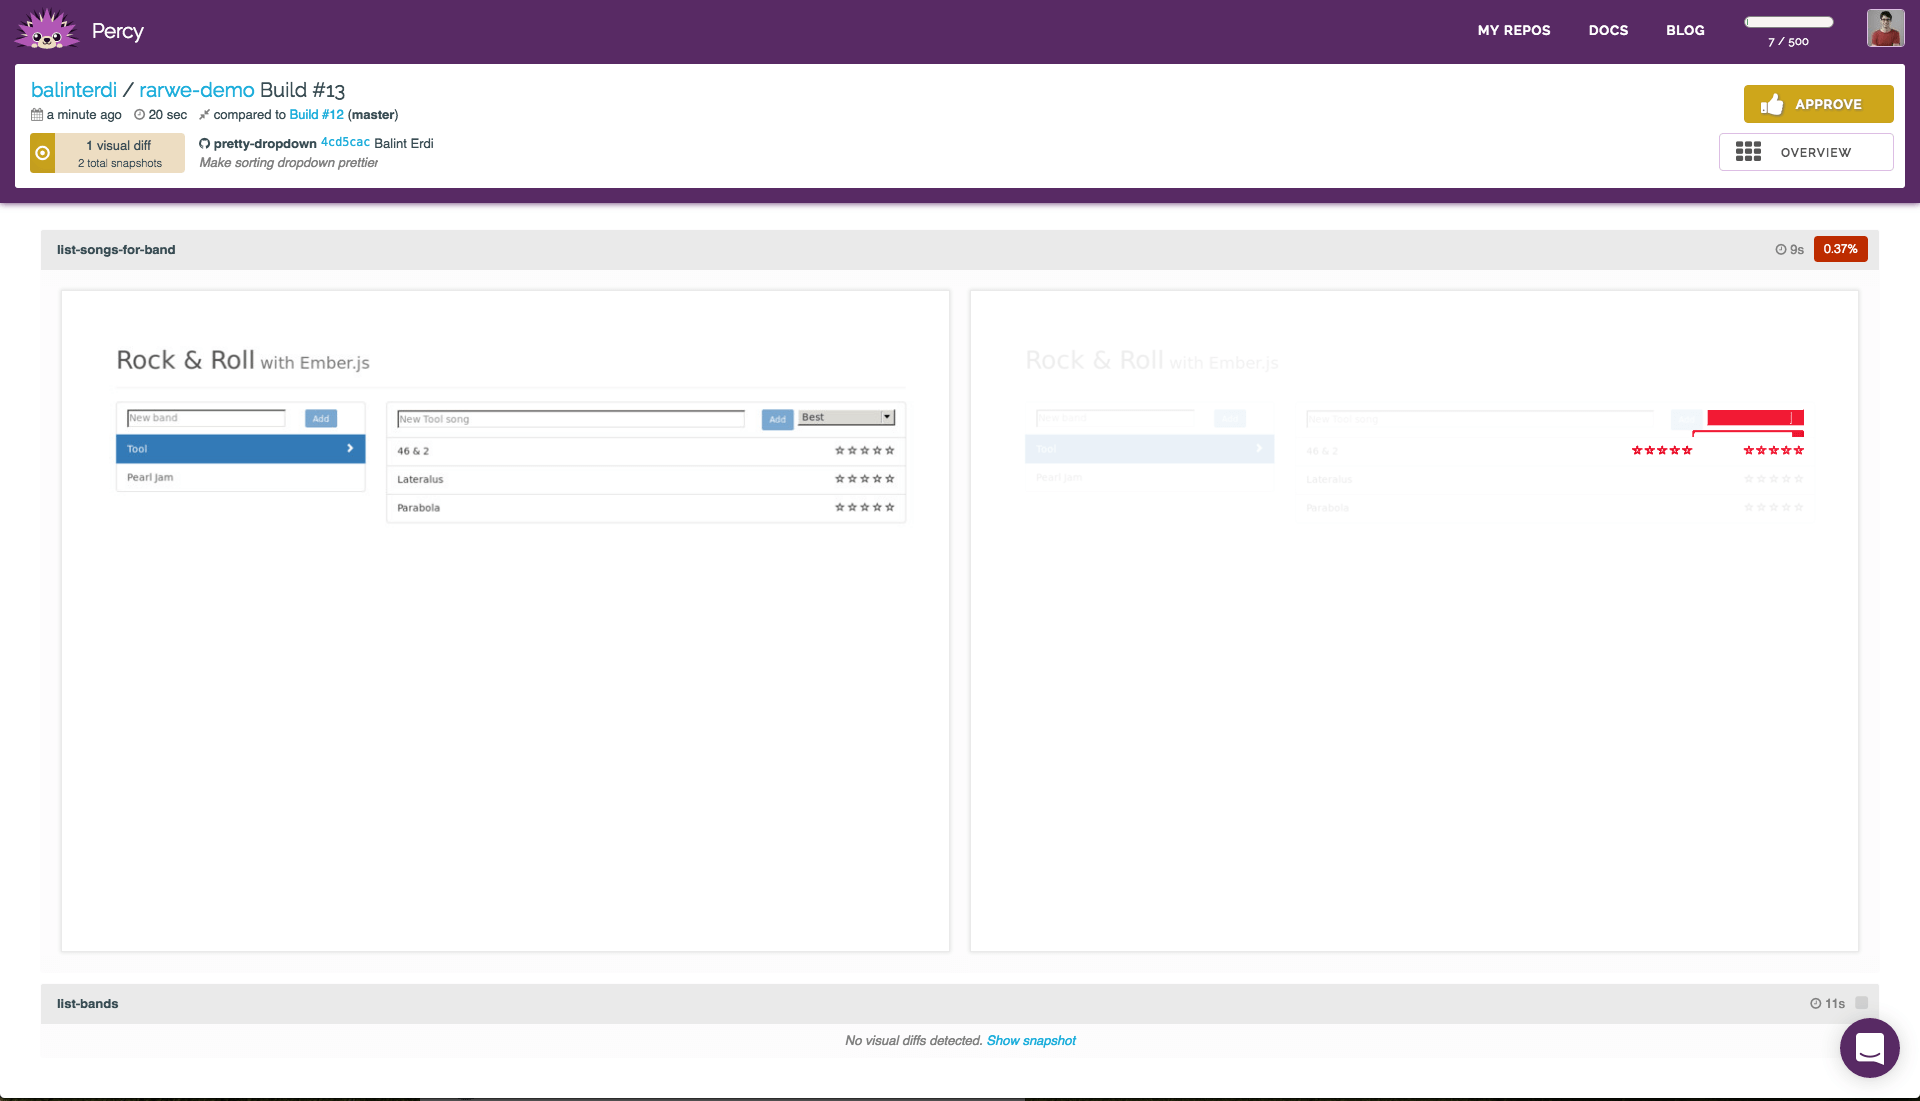
Clicking "Details" takes us to the visual diffs where we must explicilty approve the changes:
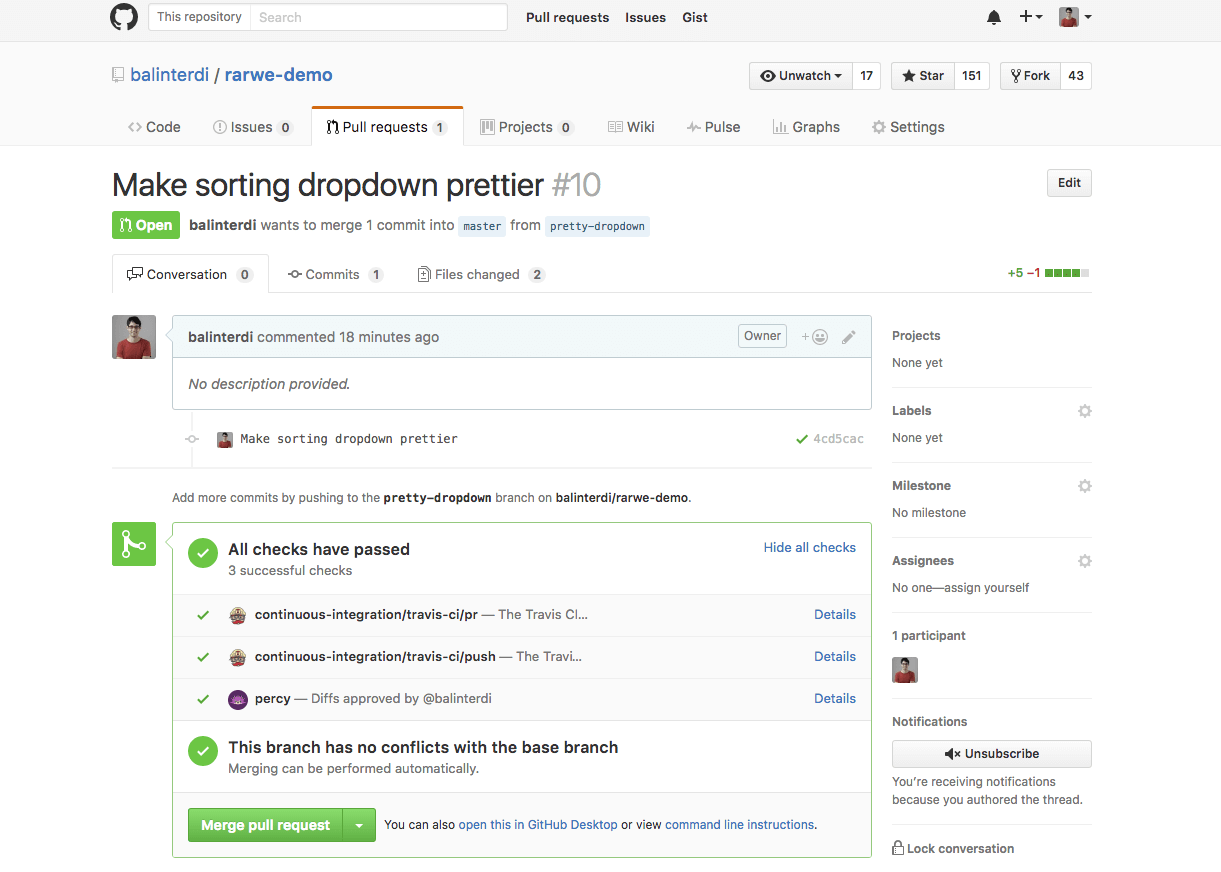
Once the visual diffs are approved, the PR is all green and we can lean back in our chairs and merge it, safe in the knowledge we did not visually break the app.
Just as with "normal" tests, the more snapshots we have, the higher the chance we did not introduce any regressions with our latest changes. Mike recommends a "breadth first" approach, making screenshots from tests that verify different scenarios instead of a "depth first" approach, creating several screenshots for the same scenario.
Closing words
I'm all sold on visual diffing and I think there is tremendous value in securing our apps this way.
I encourage you to watch Mike's presentation and sign up for Percy to become a better steward of your applications.
Share on Twitter